
DIY Halloween Wood Sign with Cricut: “Something Wicked” Tutorial
Looking for a spooky statement piece to add to your Halloween décor? This DIY “Something Wicked This Way Comes” wood sign is the perfect Cricut project for the season. Using black vinyl on a crisp white background and a hand-painted black chalk frame, this sign has just the right mix of farmhouse charm and Halloween vibes.

My daughter knew exactly what I wanted to Mother’s Day this year – a Cricut! I’ve wanted one for a while, but I gawked at the price tag. I couldn’t justify yet another crafting toy. I don’t have enough time for all my projects. But my daughter convinced my husband that I NEEDED a Cricut. So……I am now the proud owner of a Cricut Joy xtra folks!
Of course, there is a learning curve. My first attempt at creating stickers was, well, let’s just say I’m not showing the result. It’s been shredded and thrown away.
Thankfully, I figured it out enough to create this awesome little sign for Halloween. And I thought I’d share it with you!
Supplies
- 8 x 10 Unfinished wood framed wood board (framed area is approximately 6.9 x 9)
- Black chalk paint
- White chalk paint
- Foam brush
- Permanent Adhesive Vinyl
- Transfer paper
- Sewing machine
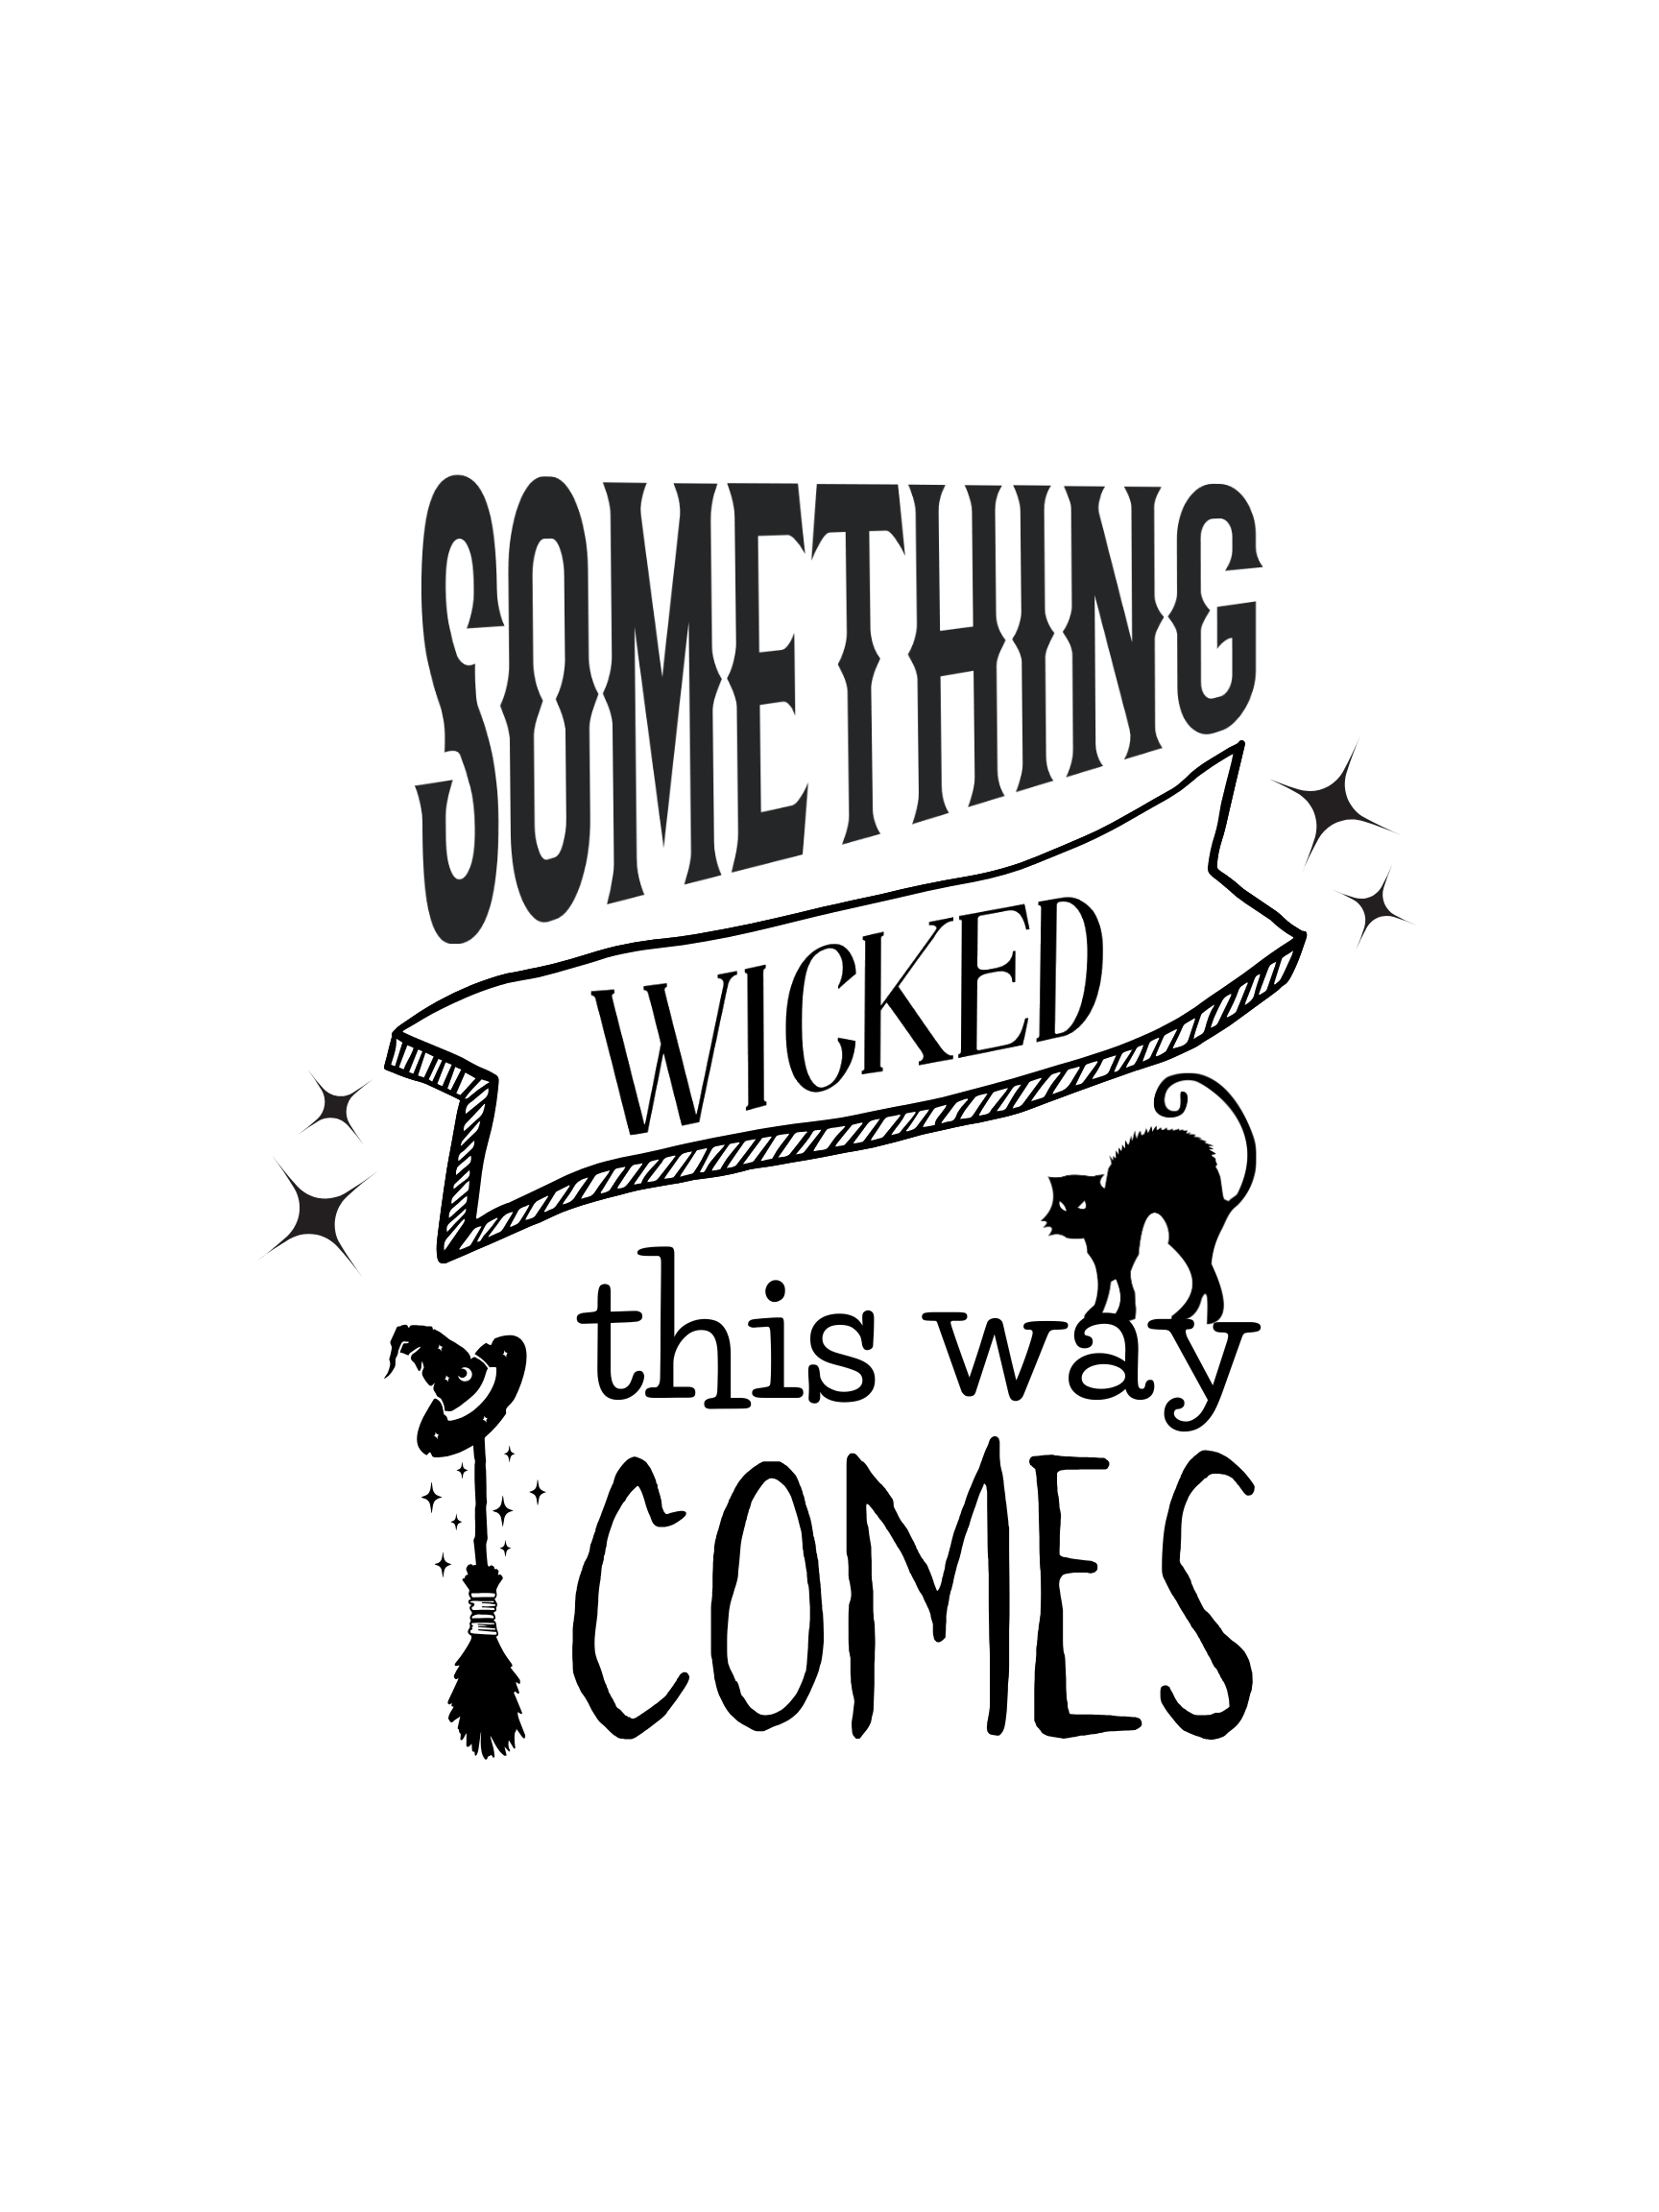
- “Something wicked this way comes” … PNG file
- Cricut

DIY Halloween Wood Sign
Step 1: Prepare your Free PNG file
Start by downloading the free PNG file for your Cricut and uploading it to your Cricut design space.
When you open your Cricut design space, select vinyl decal from the drop-down menu under New Project.
Upload the PNG file. You will need to reduce the size to fit into your 6.9 x 9-inch surface area on the framed board. I reduced mine to 6.5 x 8 inches.
Continue the process to cut your vinyl and remove the “empty space” areas from the design.


Step 2: Prep your wood frame board
I found a framed board at Hobby Lobby with a whitewashed surface area and gray frame. Unfortunately, I can’t find it on their website the same size I used. Instead, I provided a link to some unfinished versions on Amazon, which will work just fine for this project. Use your foam brush to paint the interior surface area with white chalk paint and paint the frame black.


Step 3: Transfer the design to the framed board
Trim your transfer paper down to fit within the wood surface area – approximately 6.9 x 9. Lay your transfer paper on top of your vinyl design (hopefully, it’s still intact and you didn’t throw it across the room while trying to pick out the ‘empty space’ pieces).

Carefully pull the design up with your transfer paper and align it with the framed surface area of your board. Lay down the design and use a credit card or another hard edge to rub the vinyl design onto the board and pull off the transfer paper. If some of the design is still stuck to the transfer paper, lay it back down and rub it some more. Remove the transfer paper slowly so you can catch anything that doesn’t transfer properly.


Now add your new sign to your Halloween decorations!
