Free Paper Piecing Easter Egg Pattern for Raw Edge Appliqué
I wanted to make an Easter egg table runner with appliqué Easter eggs. I have this stash of scraps from a quilt I made for my daughter when she was a toddler. There are so many scraps, and I love the colors, so I couldn’t throw them out.
But this year I said “no more!” Gotta find something I can do with these scraps. They’ve collected dust in my closet for the past 5 years. It’s time crafter peeps!
The fabric scraps’ colors always whispered a little Easter to me.
At first, I tried to freehand the scraps into an Easter egg. It wasn’t pretty, I’ll admit. I’m not very good at freehanding. I need a pattern. I need to know exactly where my sewing lines are, or I’ll get mixed up.
That’s when I came up with my Easter egg paper pieced patterns. It was pretty easy because I used Canva. (If you aren’t using Canva, you should! And no, they don’t pay me to say this. I just love it, and you can get a free account. It’s an easy program to use for designing simple patterns and everything else.)
Anyways, I digress.
Let’s get started with these Easter eggs.
Supplies
- Fabric scraps of your choice (at least 7 different colors/patterns)
- Foundation Paper (I use this one.)
- Printer
- Easter egg applique pattern
Let’s make our Easter egg raw edge appliqué!
Prepare your materials
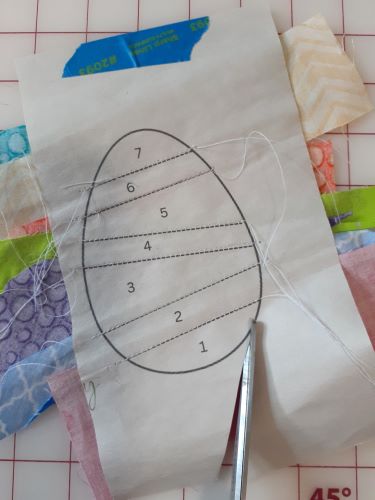
Start off by downloading the pattern here and printing it on foundation paper. I love the foundation paper because you see the sewing lines through the paper when held up to the light. It’s durable enough not to easily tear during sewing but thin enough to easily tear away from the completed applique.
Both patterns make a 5.5-inch-tall Easter egg (approximately 3.25 inches at the widest point). If you want a smaller egg, adjust the Custom Scale print size when printing. Cut the patterns apart and decide which one you are starting with.
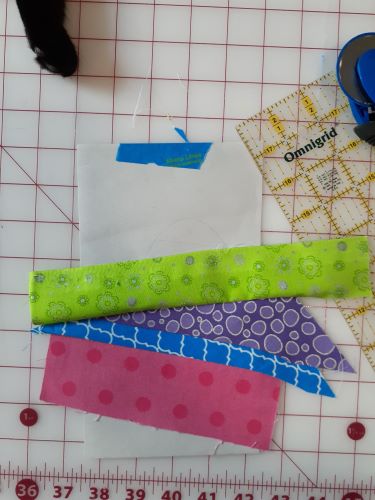
Find the right-sized scraps for your pattern
Before you start sewing, be sure to pull out the fabric scraps you want to use and compare them to each numbered section on the pattern. Each piece needs to cover the entire section plus have at least ¼ inch over the bordering sewing lines.
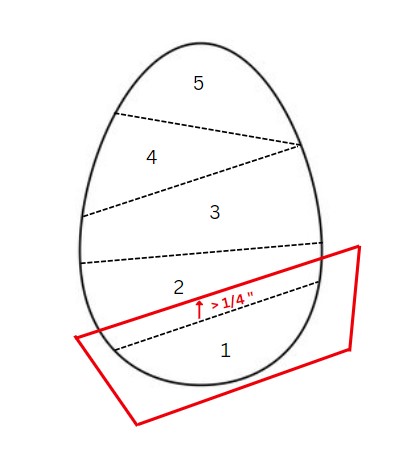
Be sure you check fabric sizing for every numbered section of the pattern.
Pinning your fabric in place
Once you know which fabric scrap will go in each section, use a piece of tape to tape the pattern – the wrong side facing you – on the window. This makes it easy to see the sewing lines through the paper.
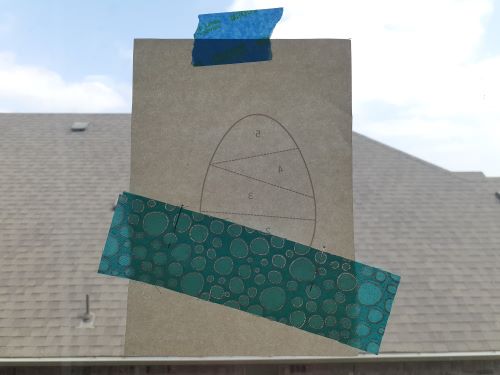
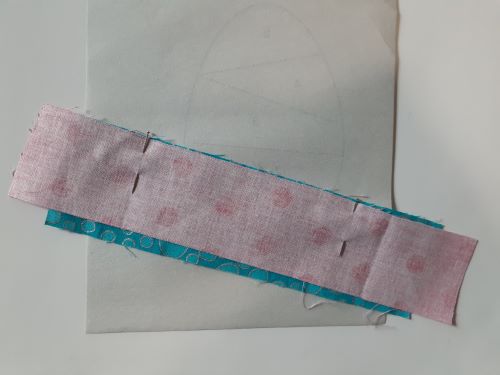
Pick up the first scrap and lay it right-side facing you over section 1. Be sure the edge of the fabric is ¼ inch above the sewing line. Pin in place.
Next, grab the fabric scrap for section 2. Place the wrong side on top of the section 1 fabric lining the edges. Pin in place.
Start sewing
Turn the paper over so you can see the pattern. Sew along the dotted line for section 1 back stitching on both ends.
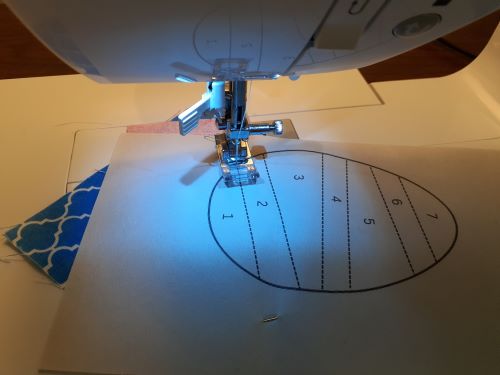
Turn the pattern over with the fabric side facing you. If the seam is more than ¼ inch, fold the paper back along the stitching line and trim the seam down to ¼ inch.


Press the fabric back to cover section 2 and press with an iron.
Repeat this process for each section
Lay the fabric scrap for section 3 wrong side up and on top of section 2 with the edges aligned. Pin in place. Turn over the pattern and sew along the second dotted line. Don’t forget to trim the seam to ¼ inch if needed. Then, press the fabric into place.
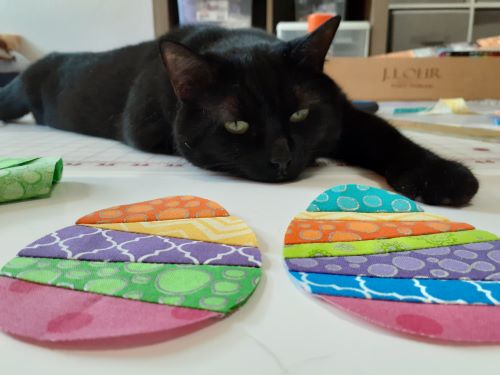
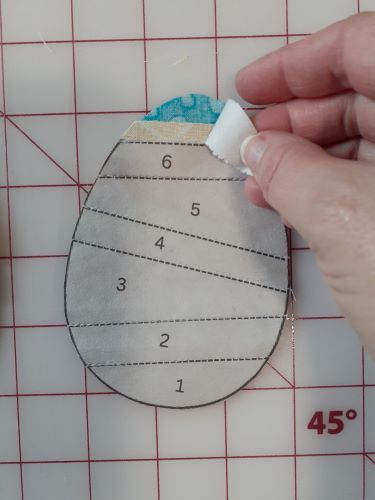
Continue this process until all the fabric scraps are sewn into place. (My cat decided to help. Please ignore the kitty paw below!)
After all the fabric is in place, it’s time to cut out the egg!
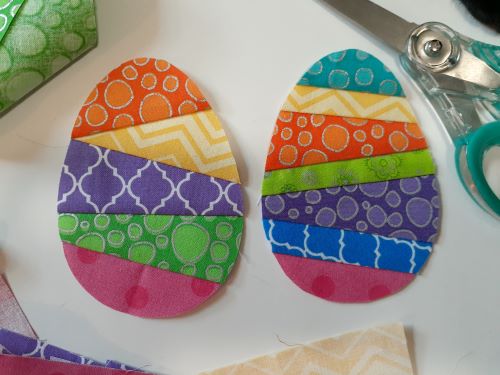
Once you are finished, it should look something like this:
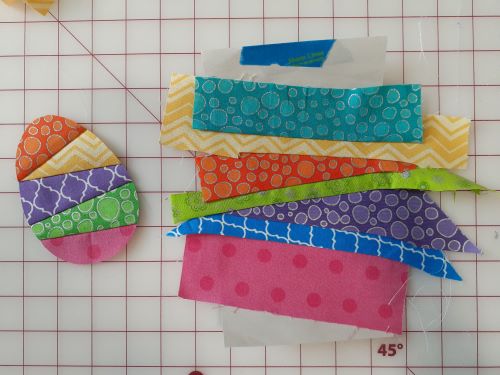
Looks a little goofy if you ask me. But it’s coming together!
Give the quilted fabric one last press with the iron before turning the paper over and cutting out the egg.
Carefully, tear off the paper pattern one section at a time.
Now you have your Easter egg applique ready to go! I’m looking forward to sharing my table runner once it’s done. What will you make with yours? Share it in the comments below. I’d love to see photos too.