
How to Hand Paint Wood Beads with Acrylic Paint: 2 Methods
Quite a few of my latest home décor projects include hand painted wooden beads. They’re versatile. You can use them to make coasters, wall hangings, tiered trayed garlands, and much more. In short, I LOVE them! And they are everywhere right now. But the greatest thing about them is how simple it is to transform them into whatever project I’m working on. One coat of paint can add a playful vibe or a fancy flare.

While you can buy pre-painted wooden beads, I prefer painting them myself. It’s easy, and you aren’t stuck with a surplus in one color. Paint only what you plan to use for your latest project.
If I want to use acrylic paint, I use these two methods below. Deciding which one to use depends on the number of beads I paint. Let’s dive into these two ways to paint wood beads with acrylic paint.
Method 1:
This is the easiest and least messy method. Unfortunately, it’s a little time-consuming, so I reserve this approach for projects that don’t require a lot of wooden beads – like the wood slice Christmas ornaments I make for my children’s teachers.
In my experience, this is the easiest way to get an even coat of paint.
So, here we go. First – let’s cover the supplies needed.
Method 1: Supplies List
- Wood chopsticks or metal skewers (needs to fit through the wood bead hole)
- Acrylic paint
- Small paint brush
- Take-out container or bowl
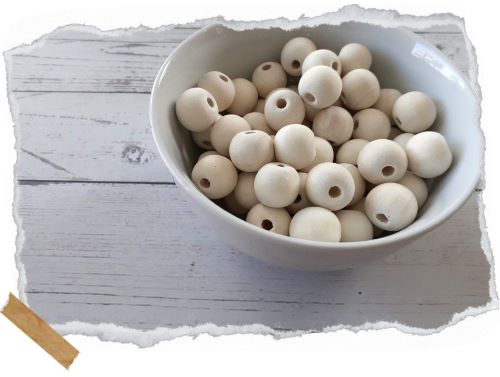
- Wood beads
- Masking or painter’s tape
Method 1: How to Paint Wood Beads Using Acrylic Paint
1. First, wrap a piece of tape around the skewer or wood chopstick. I used my husband’s metal shrimp skewers and the paint won’t come off so now I owe him a new pair.
2. Slide your wooden bead over the tape. The fit should be snug to prevent the bead from spinning around the skewer.
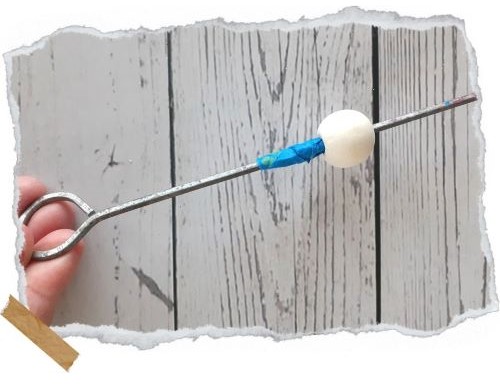
3. Time to grab your paintbrush! Paint the bead and lay the skewer across the container to dry.
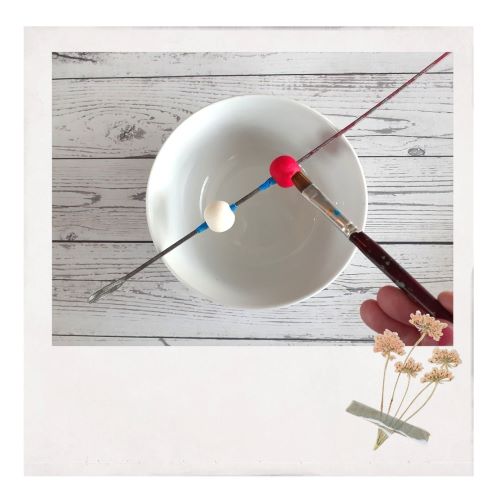
4. Once the beads are dry, look at them and see if they need another coat of paint. If so, grab your brush.
5. When you’re happy with the paint coverage pull them off the skewer and you’re ready to use them or store them for a future project.
Method 2:
I use this method when I need a lot of beads for a project, like a wood bead garland. It can be a little messy, but it makes painting beads in bulk faster than painting each bead on a skewer.
Without further ado, here is the supply list for method number two.
Method 2: Supply List
- Paper plate
- Acrylic paint or pre-mixed acrylic pouring paint
- Wood chopsticks or a stick from the yard or a plastic knife (used to stir the beads in the paint)
- Plastic take-out container or a bowl for the paint
- Heating tool or hairdryer
Method 2: How to Paint Wood Beads Using Acrylic Paint
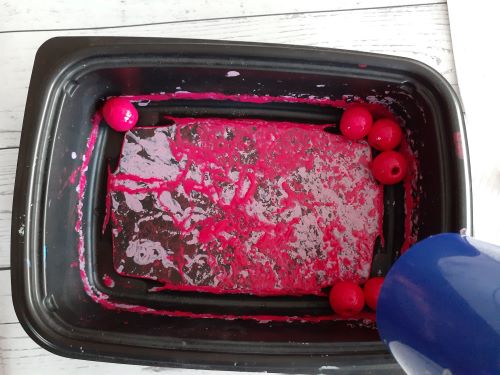
1. Pour acrylic paint into the container or bowl. The amount depends on the number of beads you want to paint.
2. Acrylic paint is too thick for the beads to roll in, so you need to thin it out with an equal amount of water. If you use pre-mix acrylic pouring paint, you can skip adding water.
3. Next, drop a handful of wood beads into the container or bowl.
Tip: Add some texture to your painted beads. Throw some sand into the paint and mix it before adding the beads.

4. This is the fun part. Use your chopstick/stick-from-yard/plastic knife to stir the beads around in the paint. Make sure they are completely covered in the paint before the next step.
5. Dump the paint-coated beads onto a paper plate. (I ran out of paper plates and used another take-out container.)
6. Start drying the beads with a heating tool or a low heat or cool setting on a hairdryer. Either shake the plate or use your stick to roll the beads around while you dry them.
Tip: I tried putting the beads on a skewer and setting them out to dry but – because of the excess of paint in this method – the paint dribbled down the beads leaving an uneven coat. Rolling them around the plate removes the excess paint and leaves an even coat.
6. Once dry, your beads are ready for your next craft project!
