
How to Make a Rustic Fall Garland
Fall is on the way, and it’s time to start decorating! This easy DIY fall garland is perfect for adding a touch of rustic charm to your home. Made with felt and burlap, it’s a simple and affordable way to get into the fall spirit.

Fall is usually a beautiful time of year, with its crisp air, changing leaves, and cozy vibes. Unfortunately, someone forgot to tell Houston what time of the year it is. It still feels like summer! But if I start decorating for fall, it will make it so, right? Wishful thinking – I know! Although it may not feel like fall is around the corner, it is coming, so it’s time to pull out our crafting supplies.
Let’s craft our way to some festive fall décor.
This easy DIY fall garland is a great way to add a touch of farmhouse charm to your home. Made with felt and burlap, it’s a simple and affordable project that anyone can do. And if you know me then you know I love garlands. They are so versatile. Hang them on the wall, over a door, across a mantle, or as part of a dining table center piece.
Here’s the step-by-step process of making your own fall garland. I’ll also provide some tips and tricks for getting the best results. So, gather your supplies and let’s get started!
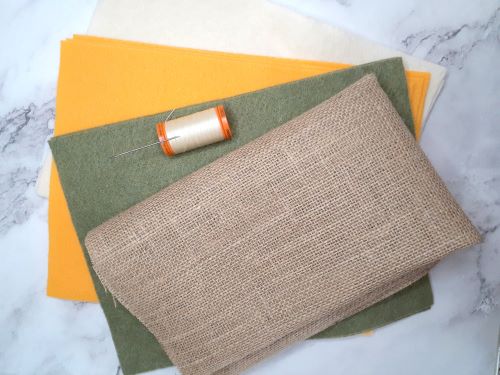
SUPPLIES
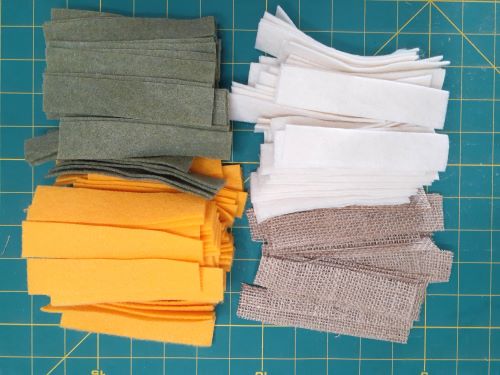
- 4 sheets of Antique White felt (9′′ x 12′′)
- 4 sheets of Olive Green felt (9′′ x 12′′)
- 4 sheets of Gold felt (9′′ x 12′′)
- ¼ yard Burlap fabric
- All Purpose thread (I used Nylon upholstery thread because it’s what I had on hand.)
- Scissors or Rotary Fabric Cutter
- Embroidery needle
Tip: The burlap fabric will unravel around the edges for a rustic look. However, if you don’t like the unraveled look, you can use 1-inch-wide burlap ribbon instead! The ribbon has a stitch along both edges to prevent unraveling.
Making a Fall Garland with Felt and Burlap
Step 1: Prepare your materials.
Determine how long you want your garland and add at least 6 inches. Cut your thread accordingly. The supplies I used made a 52-inch garland for my table center piece. You can make yours longer by adding more burlap and felt.
Cut down your felt and burlap fabrics down to 1 x 9-inch strips.
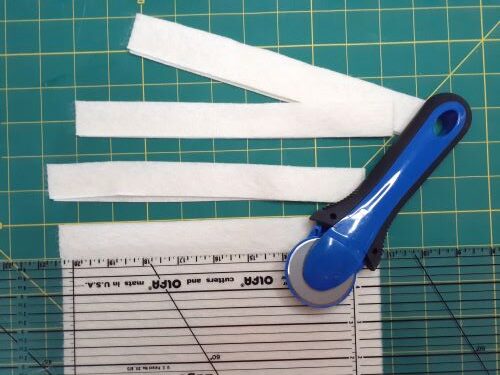
Then, cut each strip in half to be 1 x 4.5- inches.
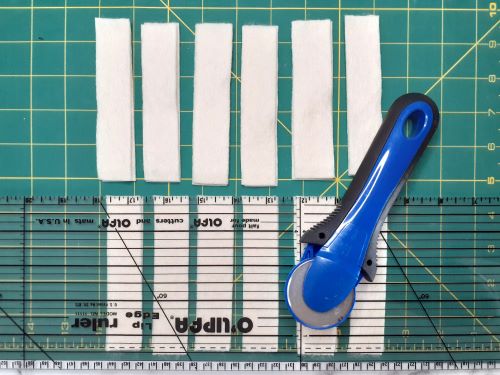
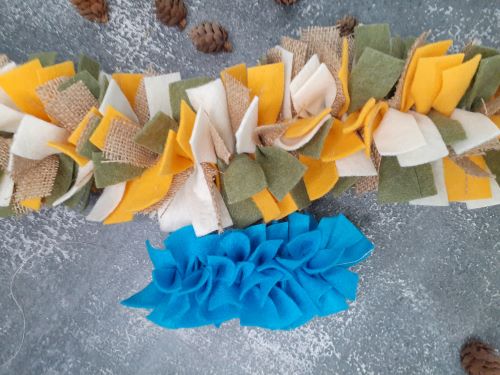
Tip: If you want a thinner garland, cut each strip into thirds. I started a blue garland with the felt strips cut into 1 x 3-inches instead of 1 x 4.5-inches so you can see the size difference.
Step 2: Prepare your thread.
First, tie a triple knot at one end of your thread about 3-inches from the end. Thread the other end of your thread into the needle.
Step 3: Start sewing your garland.
Determine in what order you will sew your strips. I went in this order: olive, antique white, yellow, and, finally, burlap. Start with a piece of felt because your knot will very easily move through a hole in burlap.
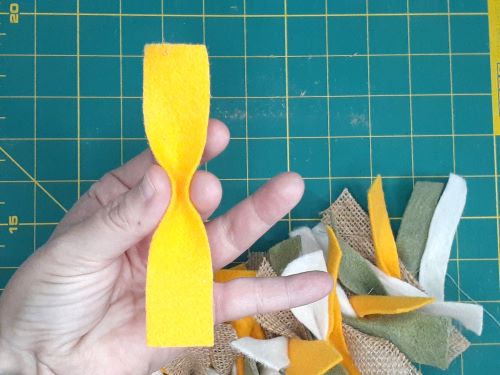
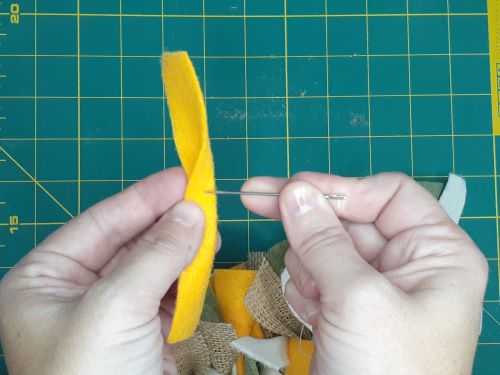
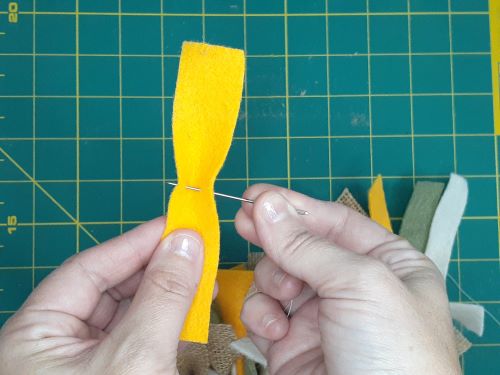
Pick up your first strip and pinch it in the middle [fig. 1]. Push your needle through both layers [fig. 2] and pull your thread all the way through until the knot hits the outside [fig. 3]. Don’t pull too hard because the knot will go through the felt.
Tip: Tie a wood bead onto the end of your thread instead of a knot. It will hold your fabric in place while also adding a bit of character.
Repeat this process until all your strips are on the thread.
Step 4: Finish the garland.
Compact the strips by pushing them as far down the thread as possible.
Sew a knot into the last strip to hold them together (or tie a wood bead onto the end of the thread.)
If you’d like to hang your garland, tie a loop at each end.
Now your garland is done. Happy fall, y’all!