
How To Paint & Distress Mason Jars: DIY Farmhouse Decor
Mason jars are the epitome of farmhouse décor in my book! My grandmother used Mason jars for canning vegetables from her garden. One or two pantry shelves were always crowded with them. She also stored dry food in them too.

These days, mason jars serve an additional purpose – adding that farmhouse touch to home décor.
Throughout the years, I’ve grown quite the collection of them because of all the canned veggies grandma sent home with me. After cleaning them, I find some way to use them – usually in my craft room.
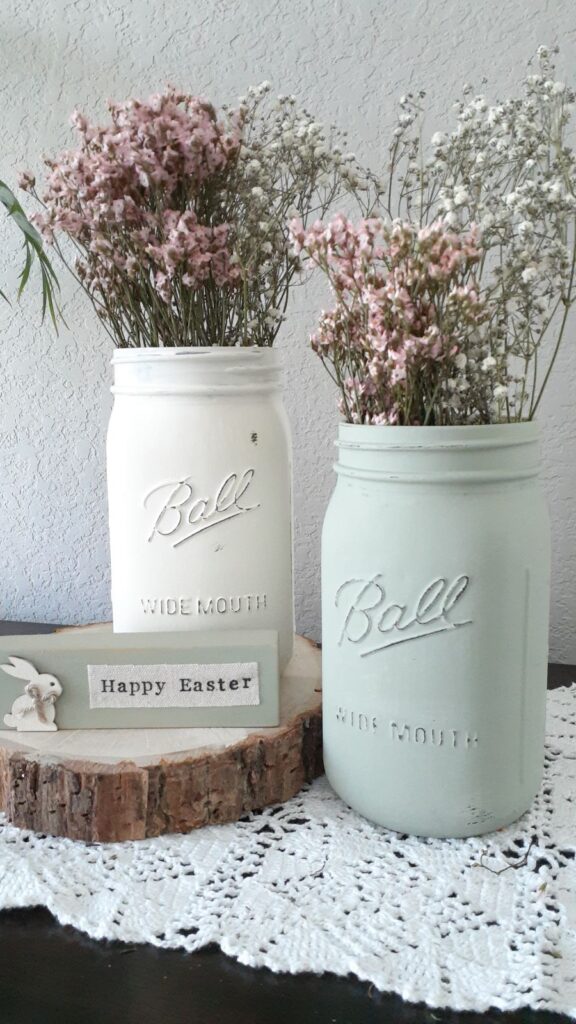
But painting them is always a fun option! And a cheap one at that. Use them as an easy farmhouse-style vase, candle holder, or dinner table centerpiece. I decided to turn three of mine into a Easter dinner table centerpiece.
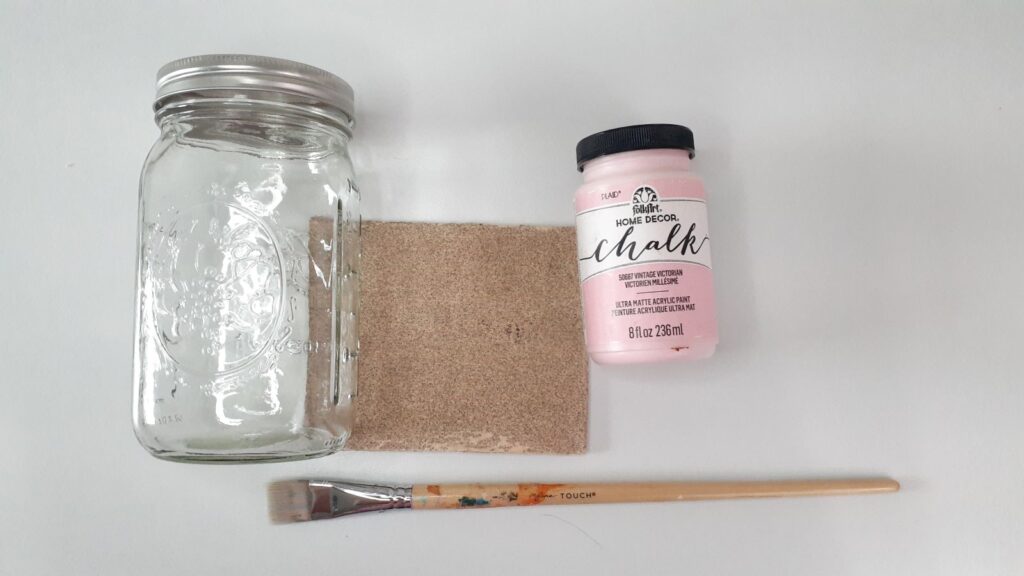
Supplies
- Mason jar (use one you have on hand or purchase them from a craft or grocery store)
- Chalk paint
- 60/80 grit sandpaper
- Paint brush or foam brush
DIY Farmhouse Décor: How to Paint and Distress Mason Jars
Step 1: Clean your jars.
You want to be sure to remove any food or dust from your jars. A clean surface makes it easier for the paint to stick.
Also, don’t start painting until your jar is completely dry. Sometimes a rag can leave particles behind on the jar’s surface so I recommend letting it drip dry, which could take a good amount of time. I’d wait for 24 hours.
Step 2: Apply the first coat of paint.
This process takes a few coats – three or four. Use your paint brush or foam brush to paint the first coat on the outside of your mason jar.
The tricky part was painting in between the raised pattern in the glass. But it can be done!
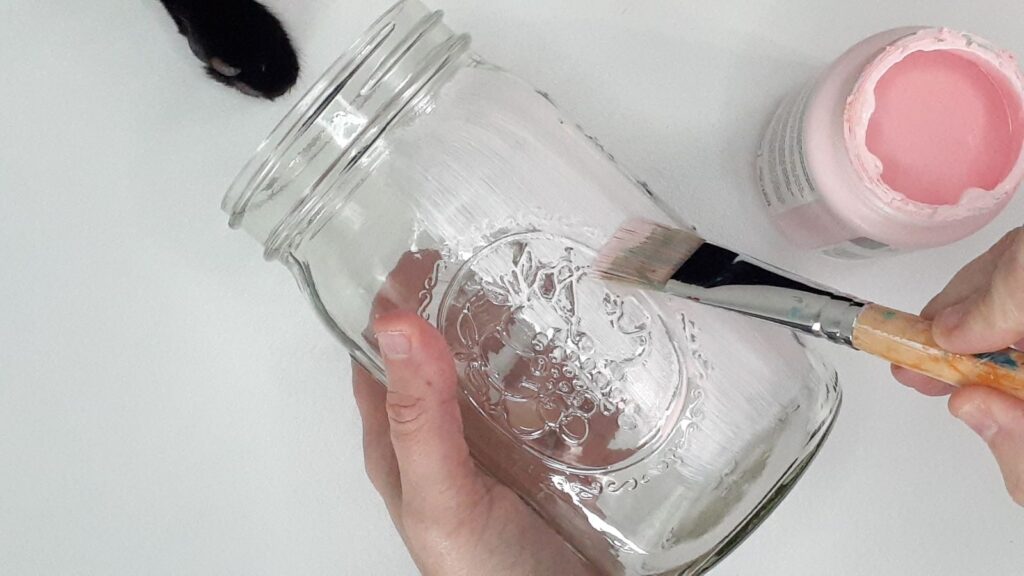
Don’t worry about getting an even or full-coverage coat on the first try. Paint doesn’t stick to glass very well so it will appear streaky and thin.
Leave the first coat to dry overnight.
Step 2: Paint the second coat.
I should have added patience to the list of supplies! Applying the second coat too soon can cause bits of the first coat to come away from the jar. So, make sure it is completely dry, especially if you don’t have any patience lying around and decide to dive into the second coat early.
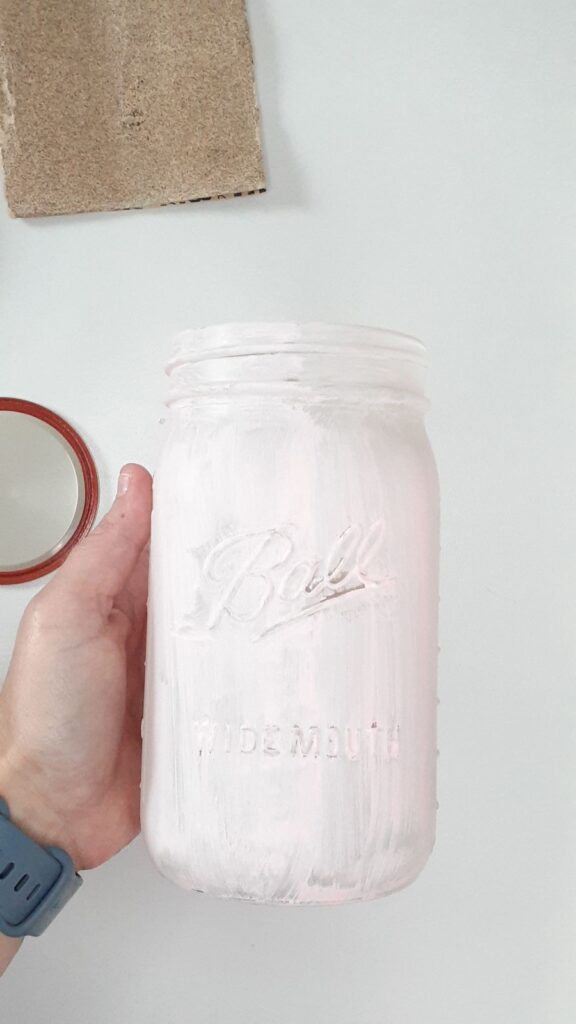
As you paint the second coat, monitor your brush strokes. Don’t apply much pressure. Let your paint brush glide across the surface.
Leave it to dry overnight – another 24 hours would be best.
Step 3: Paint the third and fourth coats if needed.
Repeat the process until you’ve achieved the amount of coverage you are looking for. I stopped at three coats, but I also really liked some of the streakiness in the paint. If you want it to be smooth, add a fourth coat.
Again, let it dry for 24 hours between coats.
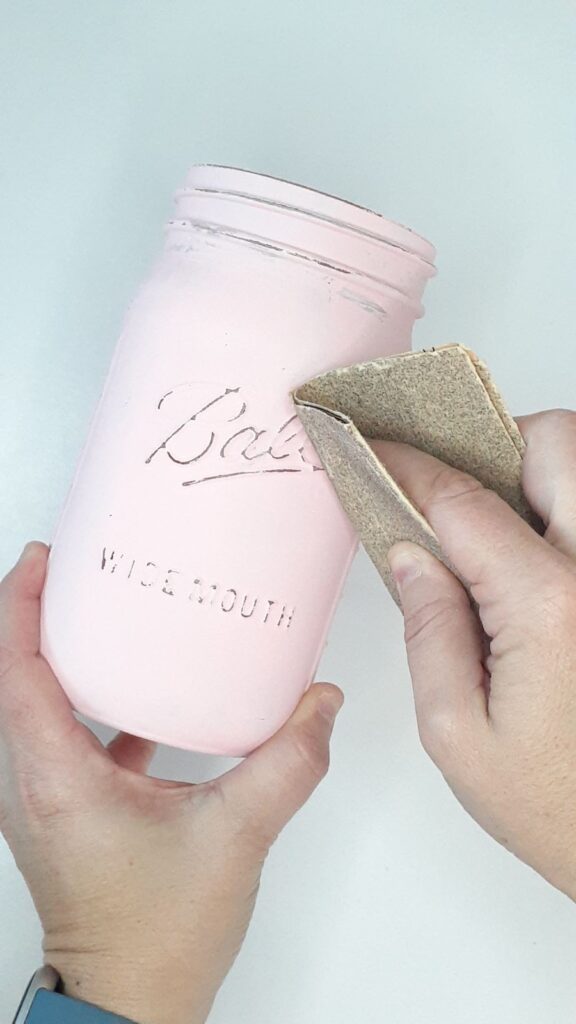
Step 4: Distress your jar.
Find that sandpaper and start rubbing it over the raised design on the jar. However much you remove is up to you. I left some paint on mine to give it a more rustic look.
Step 5: The finishing touches.
I felt mine looked a little bare, so I decided at the last minute to wrap some jute string around the top of one. I love it! I’m still debating if I want to add it to all three.
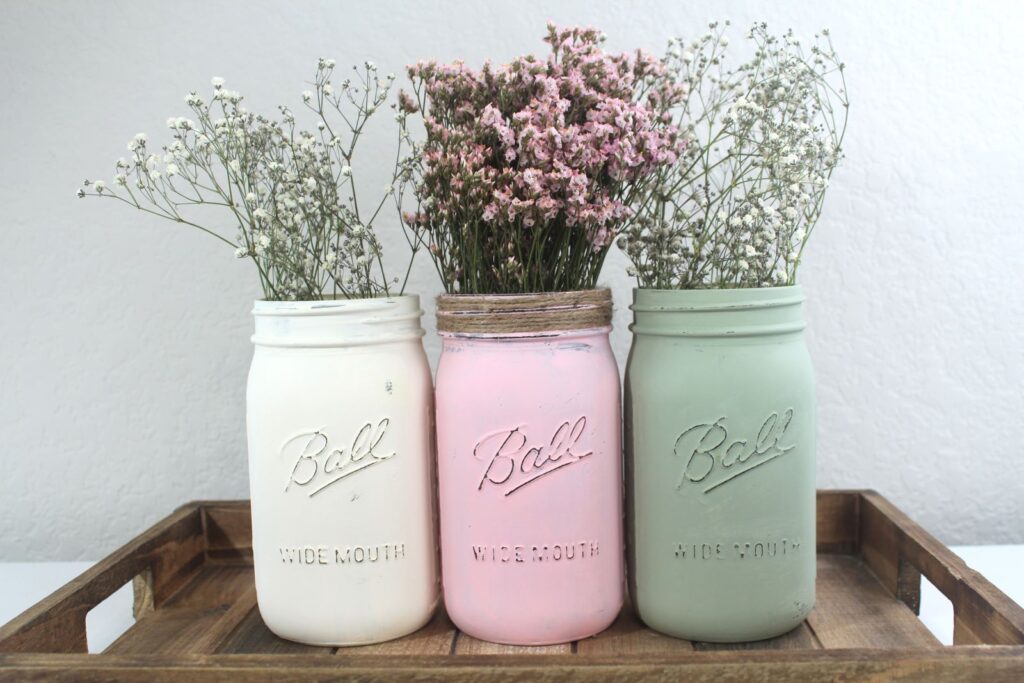
You can dress your jar up with a little jute string, ribbon, lace, whatever you have lying around. Throw some flowers into each one and use as a makeshift vase. I dried some baby’s breath (and some other tiny pink flower I don’t know the name of) and used them in my jars.
If you interested in other glass painting tutorials, check out my post on Easy Painted Glass Jars Fall Decor.
Easy Reusable Fabric Easter Eggs – Free Pattern
I don’t know about you, but I’m tired of broken plastic Easter eggs. Every year, it’s inevitable – someone breaks a few and the plastic bits end up in the carpet or deep in the grass if the weather is tolerable enough for an outdoor egg hunt. We always end up replacing half our plastic…
Free Paper Piecing Easter Egg Pattern for Raw Edge Appliqué
I wanted to make an Easter egg table runner with appliqué Easter eggs. I have this stash of scraps from a quilt I made for my daughter when she was a toddler. There are so many scraps, and I love the colors, so I couldn’t throw them out. But this year I said “no more!”…